For Heating and Cooking
Candles you need for survival are different from candles you place around your home to enhance its beauty, although the little flames are nearly equally beautiful. Why “nearly”? Because the jars have a tendency to blacken toward the top, rendering them less beautiful.
To make a Survival Candle you need certain things. From the range of things I’ve tried, I’ve found the following to work best.
Needed:
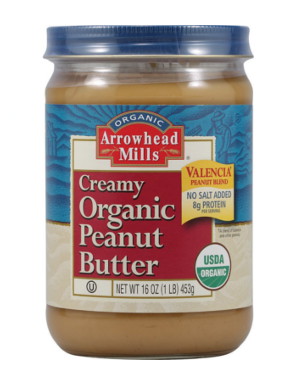
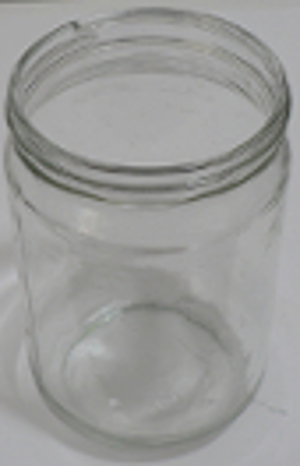
Jars ~ Peanut butter jars work great, as do pickle jars, but the mouth of a pickle jar is narrower than the body so they aren’t quite as good for candle flames. Candle flames need a good supply of air. You must remove the label, and for that the Arrowhead Mills jars are especially good. Some jars have so much glue sticking the label on that it’s a massive, tedious job to remove labels. Hint ~ for traces of glue left after lifting the label soaked in warm water, use a little baking soda on a paper towel or dish cloth to easily rub it away.
I’ve used Classico Spaghetti Sauce jars for tall candles, but the flame heats best when it’s closest to the bottom of the pot. Tall jars keep the flame away from the bottom of the pot once the candle has burned down.
With a peanut butter jar candle, you can raise the candle on an empty tuna or pineapple can once the flame is no longer above the rim of the jar.
Wick ~There is a vast array of wick from which to choose. Since you are going to be using your candles to cook and/or heat, you want to avoid wick with a metal core. The metal is not very toxic, but if you’re surviving, you want to avoid as many toxins as possible.
After testing out a wide variety of wick I found that Cotton Core wick works best. It’s sturdy enough to remain upright in hot wax you pour into your candle jar, as long as you’ve primed the wick with paraffin.
You can buy primed wick, but it’s more costly. It’s super easy to prime wick: just heat your paraffin, dip the wick to saturate it, which takes no time at all, then hang it on a peg to cool. You do have to run the wick between your fingers, ignoring how hot it is, so that the wick is smooth and not irregularly covered with wax.
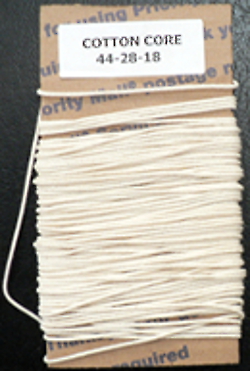
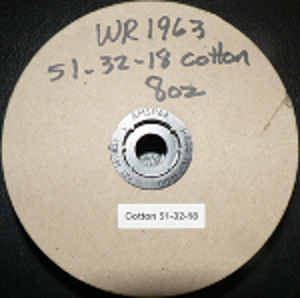
For winter, or when the indoor temperature is 50* or below, I use the 51-32-18, pictured above. 51-32-18 is a thick wick that supports a large-ish flame. When the indoor temperature is consistently in the 50s, I use 44-28-18, cotton core, which as far as I can tell, is the next size down. During the summer, i.e. in hotter weather, I get as much heat from the smaller wick as I get from the thicker wick during the winter.
1/11/2015 ~ Recently the container wax seems to have become more like pillar wax which burns hotter. My wicks were making too large a flame inside the jars, so I ordered 44-20-18 cotton core wick which came pre-waxed on a spool of 100 ft. I really like how easy it is to have the wick to hand. The flame is a good size and gives excellent heat, without burning too hot. View pre-waxed wick.
When the wick is “too large” for the overall temperature it produces a flame that burns with soot. That’s the reason I don’t use the thicker wick in warmer conditions. One has to find a happy medium between a flame is so large it results in soot and one that is so small its flame won’t be hot enough to cook things, at least not quickly.
In winter 52-38-18 gives an efficient sized flame to burn the wax cleanly. Though, you have to check the candle at the beginning of its burn, because sometimes the wick will form “mushrooms” which I think look more like cell towers than mushrooms, but Mushrooms is their common name.
Warning ~ When you first light a candle the flame is small because it has not yet created its wax pool. It’s tempting to put the candle closer to the bottom of a pot, to take advantage of all the heat the little flame is producing. But, in not too long the wax pool has formed, the flame grows an inch or two taller and begins licking the bottom of the pan. This is NOT good because it forms soot. The soot, if it is not interrupted, grows into a carbuncle like ball that eventually falls from the bottom of the pot, into the candle. This is bad for two reasons, one is that the soot smells bad and pollutes the air, the other is that the soot is flammable. If it were to catch fire from the candle then fall to a wooden table, it could cause a fire. For this reason I put tiles, saucers or plates under my candles that are not on chrome carts.
Before I began using soy wax to anchor my wicks, which is a big time saver, I used:
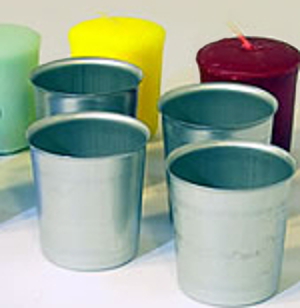
Votive Molds ~ Pouring a quarter sized votive will give you an anchor for your wick. You can pour an even smaller sized votive to anchor your wick, but at a certain point the little wafer of votive tends to crack when you pry it from the center post. I initially bought 11 of these, with wick pins. But I typically use 6 of them, so the others weren’t needed.
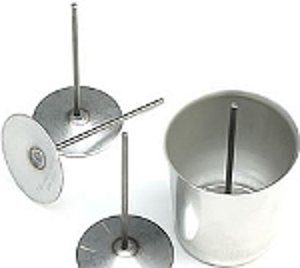
Wick Pins ~ The center post, which makes it super easy to thread in a wick, is sold separately. Pouring around a wick, which is another approach, is difficult and was not good for me since I could not get uniform results.
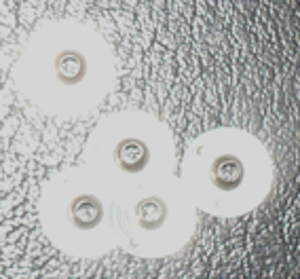
Wick Tabs ~ Once you’ve treated your wick to make it stiff, you must put a wick tab at the bottom to anchor it. Without a tab the wick floats up as soon as wax around it has melted.
I found, among the 5 day votives I bought ready made, that many had faulty wick tab placement, too close to the side of the jar so that when the flame burned down it broke the glass. I can see why so many fires are attributed to candles. Sadly people who’ve lost homes likely don’t know it wasn’t their fault.
Manufacturers’ solution of higher “collars” on the wick tabs, with a dimple to secure the wick, makes the wick tab almost impossible to reuse. I like the tabs with shorter collars so that I can reuse them. I have a pointed tool I use to reopen them so that I can clean out the used end of the old wick and put in new. They easily take several openings and reclampings.
Sand ~ a layer of sand on the bottom of your jar will keep the candle flame from breaking the jar when it’s at the bottom of the wick.
Thin, flat stones ~ This is essential, because without it the sand becomes saturated with wax and often will burst entirely into flame, breaking the glass jar, as well as sounding very worrying when the glass cracks. It cracks Loudly.
//www.youtube.com/watch?v=lE4kJ-Z3wuM
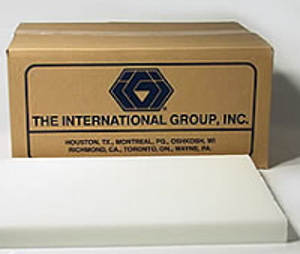
Paraffin Wax ~ I buy both straight paraffin and straight paraffin container wax.
Straight paraffin has a higher melting point than either soy or paraffin container wax. Thus, straight paraffin is essential for priming wick. The down side of straight paraffin is that it takes longer to melt.
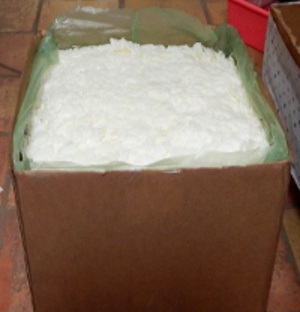
Straight paraffin container wax, on the other hand, melts quickly. You can make more candles, more quickly using it. But, container wax can be a challenge to get out of the box and convert into smaller pieces. That’s because in summer the slabs stick together, rather tightly. It’s impossible for me to lift one out of the box, but if I tip the box on end I can pry a slab away rather easily with scissor blades or something of that nature.
Once a slab is separated, it’s soft enough in summer to cut using a wide putty knife that I rock back and forth along the line where I want the break.
In winter the slabs don’t stick together as much, but it’s not as easy to get smaller sized pieces for melting. Cutting the slabs takes much longer in winter, so hitting the slab with a hammer is an option, but the pieces don’t tend to turn out in ideal shapes for the melting pot. And oftentimes the hammer blows do no more than create dents. Overall, I’d like to make all my winter candles in the summer when the wax is easier to cut.
Paraffin wax, either kind, is less costly to buy by the case, but while you’re getting the hang of making Survival Candles, it may be wise to start with a slab of each kind.
Since I switched to pre-waxed wick, I buy only paraffin container wax. I use soy container wax to anchor my wicks, about half filling a jar at a time. I melt only the paraffin, and pour it over the soy. This makes candle making really fast.
1/7/2015 ~ Container paraffin appears to have changed. It used to be beyond shattering. Now when I cut into it, little pieces break off. It also burns hotter than previously. Peak Candle Supplies says they haven’t changed their wax, and IGI says the same. So maybe the older wax was from longer ago. Perhaps Peak Candle had a pallet of container wax cases that were slow to sell. Perhaps their largest customers buy wax by the pallet. I have no idea. I just know that I had to buy a smaller wick in order to keep the flame from being too large inside the jars. The new, smaller wick is 44-20-18 cotton core. I ordered the pre-waxed spool, which is super easy to use, but I’m not sure it’s healthy given that the waxed wick may have some plastic. No. No plastic. Customer Service got back to me and said the coating is pure wax, with a high melting temperature. Happiness.
11/29/2015 ~ I no longer buy from Peak. I’ve found that Lone Star Candle is less costly, even if you take Peak’s coupons into consideration. But, if you buy small amounts, that may not be true for you. Their shipping is super fast.
Soy Wax ~ I like to get Eco Soya, which is non-GMO and therefore has no glyphosate, wide spectrum herbicide, in it. I don’t want “cides” in my candles that I use every day. GMO soy wax is cheaper, it’s a drier kind of wax, and doesn’t feel as lovely when you touch it while you’re filling jars.
Paraffin Waxes ~ Melting Points
pillar blend 145* holds more fragrance
straight 139*
mottling 140*
straight container 123*
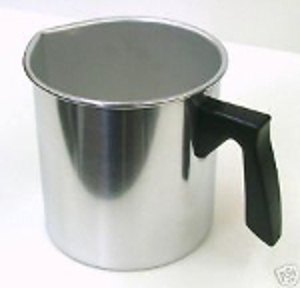
Melting and Pouring Pot ~ You could use some old pot that you don’t mind having coated on the inside with wax, but overall the proper pot is a great help and worth the investment. I use an old electric kettle lid to cover mine while I’m heating wax. Peak Candle Supplies advise, “always use it in a double boiler”, but I’ve found that when heating wax over a candle, I don’t get enough heat to melt the wax if I put the pot in a double boiler.
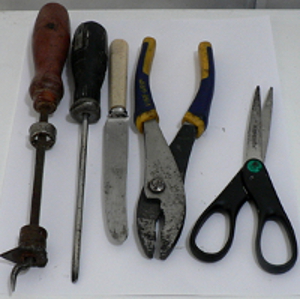
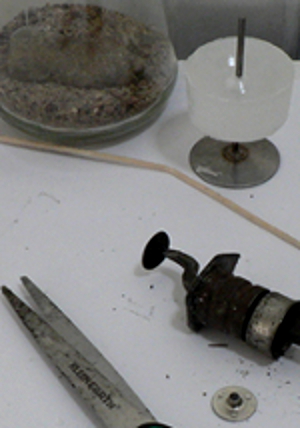
Tools ~ From left to right ~
You need something conical and sharp to open your used wick tabs if you decide to go that way, I use an antique can opener,
a long screwdriver to loosen used wick tabs so you can use them again,
a thin bladed knife to release votives from the wick pin,
pliers to close the wick tab and secure it around the wick, and
scissors to cut the wick to size. and something to tamp down the soy wax around the paraffin votive ( shown in a later picture).
Let’s Get Started
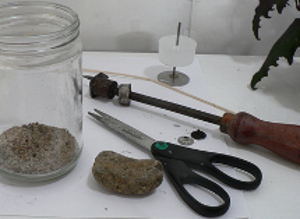
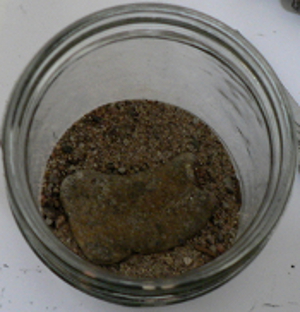
Cover the bottom of your candle jar with sand. After you add the flat stone, you may have to top up sand around it.
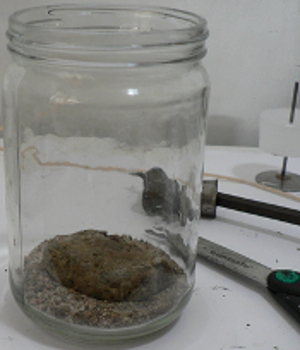
Ideally the sand around the stone is just a tad lower than the top of the stone. That way when the candle has burned down to its wick tab, the flame will go out. In this case I had to top up the sand around the stone because the stone was thick and I couldn’t find a thinner one. (Snow’s covering the ground outside.)
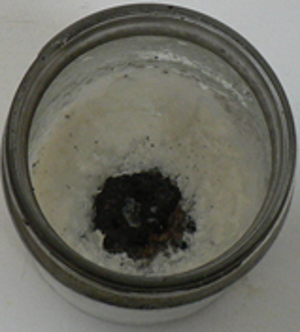
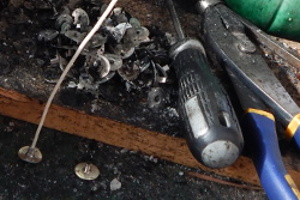
When your candles have burned down, a long screwdriver will reach to the bottom to loosen the wick tab so you can reuse it.
Inevitably there is some soot from a candle, so your jars will not stay perfectly clear like they were in the beginning, when you first made them into candles.
Wick tabs are not expensive, but they are easy to reuse, so I do. I can always use the money I save.

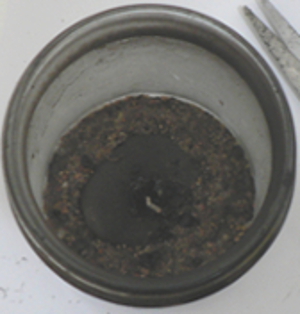
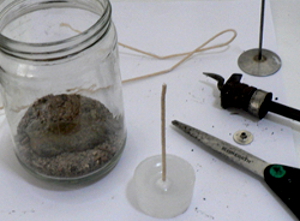
By putting a length of wick into the jar I can cut exactly the size I need. Next I’ll finish removing the votive from it’s pin and use it to secure the wick. The paraffin votive provides enough paraffin for the candle to burn with a reasonably sized flame all the way to the bottom, but with enough soy around it to keep it from sooting extensively.
Wick tab attached to wick. This is a replacement picture for the original in the series, which I appear to have lost.
There are other methods for placing wick in candles, like suspending the wick using something to hold it upright while the wax is poured and is cooling. However, without something to anchor the wick, i.e. the wick tab, in a container candle the wick will float up to the top of the wax pool once the wax has melted all the way to the bottom. That will put the flame out.
By using a paraffin votive, and surrounding it with soy, you create a candle that’s about half and half, without having to use any of your heat energy to melt the soy.
Note re Container Paraffin wax: If you are using container paraffin, once you have your jars ready and your wick primed, you can easily hold the wick with its tab in place while you place a handful of soy flakes in the jar. Container wax has a melting point that’s so much lower than straight pillar paraffin, that the primer wax on the wicks doesn’t melt and they don’t bend over. Using container wax and this method is very fast.
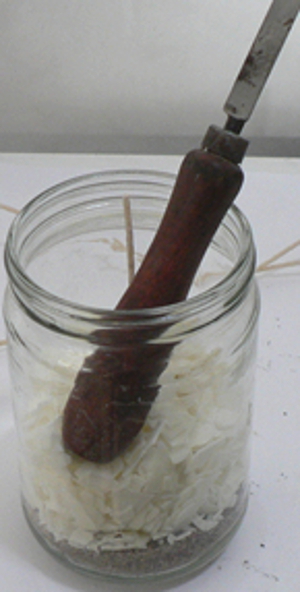
You can use anything to tamp down the wax. (Once you’re using container wax you skip this step.)
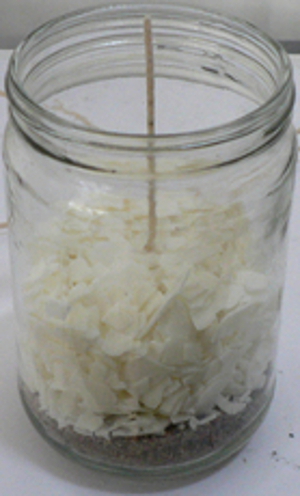
Next, you add a layer of soy wax flakes. How thick that layer should be depends on how cold your soy wax is. The point of adding the soy flakes directly to the candle jar, is to avoid the necessity of melting the soy wax. Not having to melt it saves a lot of time, and it also saves having to burn a candle to melt soy for another candle.
When it’s very cold where you are making your candles, the hot paraffin that you pour into the candle jar cools before it totally saturates the soy flakes. When that happens the candle appears to be okay, but when you burn it, it will suddenly be half way into the jar because the paraffin did not reach all the way to the bottom before it cooled.
When this happens, the wax in the lower part of the jar is primarily soy, so the flame will be tiny and not particularly hot for heating, and almost totally inadequate for cooking.
With this in mind, you want to make your layer of soy flakes thick enough to be an efficient use of your time, and thin enough so that the paraffin doesn’t cool off before reaching the bottom.
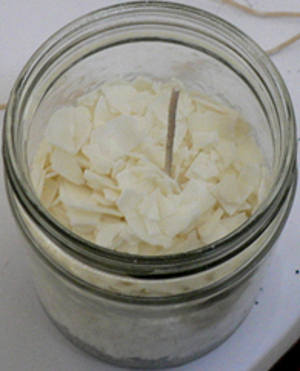
Here you see paraffin wax covering the soy flakes. When you heat your paraffin, you want to be sure that the whole chunck of paraffin is melted, that will ensure that the wax is hot enough to go all the way to the bottom of the candle jar without being cooled too much by the soy for the paraffin to reach the bottom of the jar.
Because the paraffin is being added to soy flakes it doesn’t cool with a depression around the wick: the soy wax keeps the surface of the paraffin relatively level.
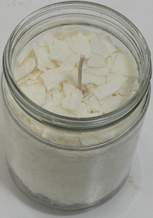
Your objective here is to add enough soy wax flakes to complete the “body” of the candle, but to leave enough space at the top for a somewhat generous layer of pure paraffin wax.
The pure paraffin will set the candle off to a good, hot start, which will help ensure that the wick burns without forming “mushrooms”.
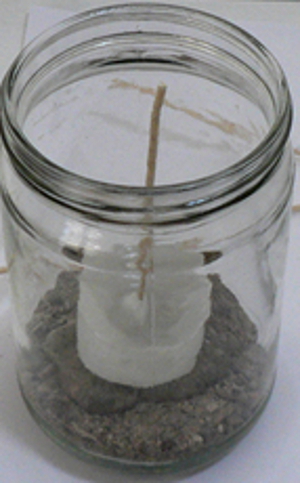
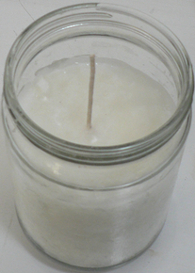
And, there you have it!
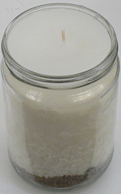
Your completed survival candle is ready to cook or heat, as you like. And, it will add a lovely dappling of light to any room in which you use it. Use enough survival candles, and you’ll get a lovely glow filling your room.
Now, it’s possible you poured the top layer of wax all in a go, in which case you may have a wide dimple around your wick. You can fill it in with melted paraffin later, or put chips of paraffin in it, since chips inevitable come into being when you’re cracking your paraffin slabs into pieces that will fit into your melting pot.
Or, you can leave the dimple there so that your beginning flame is taller.
As an aside, if you tap the top of your wick with the side of your scissors, you will flatten it a bit. Then, if you bend the wick just slightly to the side, that will help it burn cleanly without forming mushrooms.
Survival Candle Properties
burns for about 3 days
cooks best in the first 8 hours when the flame is above the rim of the jar
when flame goes below the rim of the jar, raise the jar using a tuna or pineapple tin
2 survival candles under a 1.5 or 2 quart pot will easily boil the contents
1 survival candle under a 3 quart pot will easily heat water for washing dishes ~ So hot, in fact, you’ll need to add cold